
Note: The following screenshots are for process demonstration purposes only; all data shown are test data.
Set up Your Wallet
Start by connecting your wallet to the HyperGrid Bridge. If you’re bridging to Sonic SVM, you can connect using Phantom and manually enter the address of a wallet supported by Sonic SVM Mainnet as the destination address.
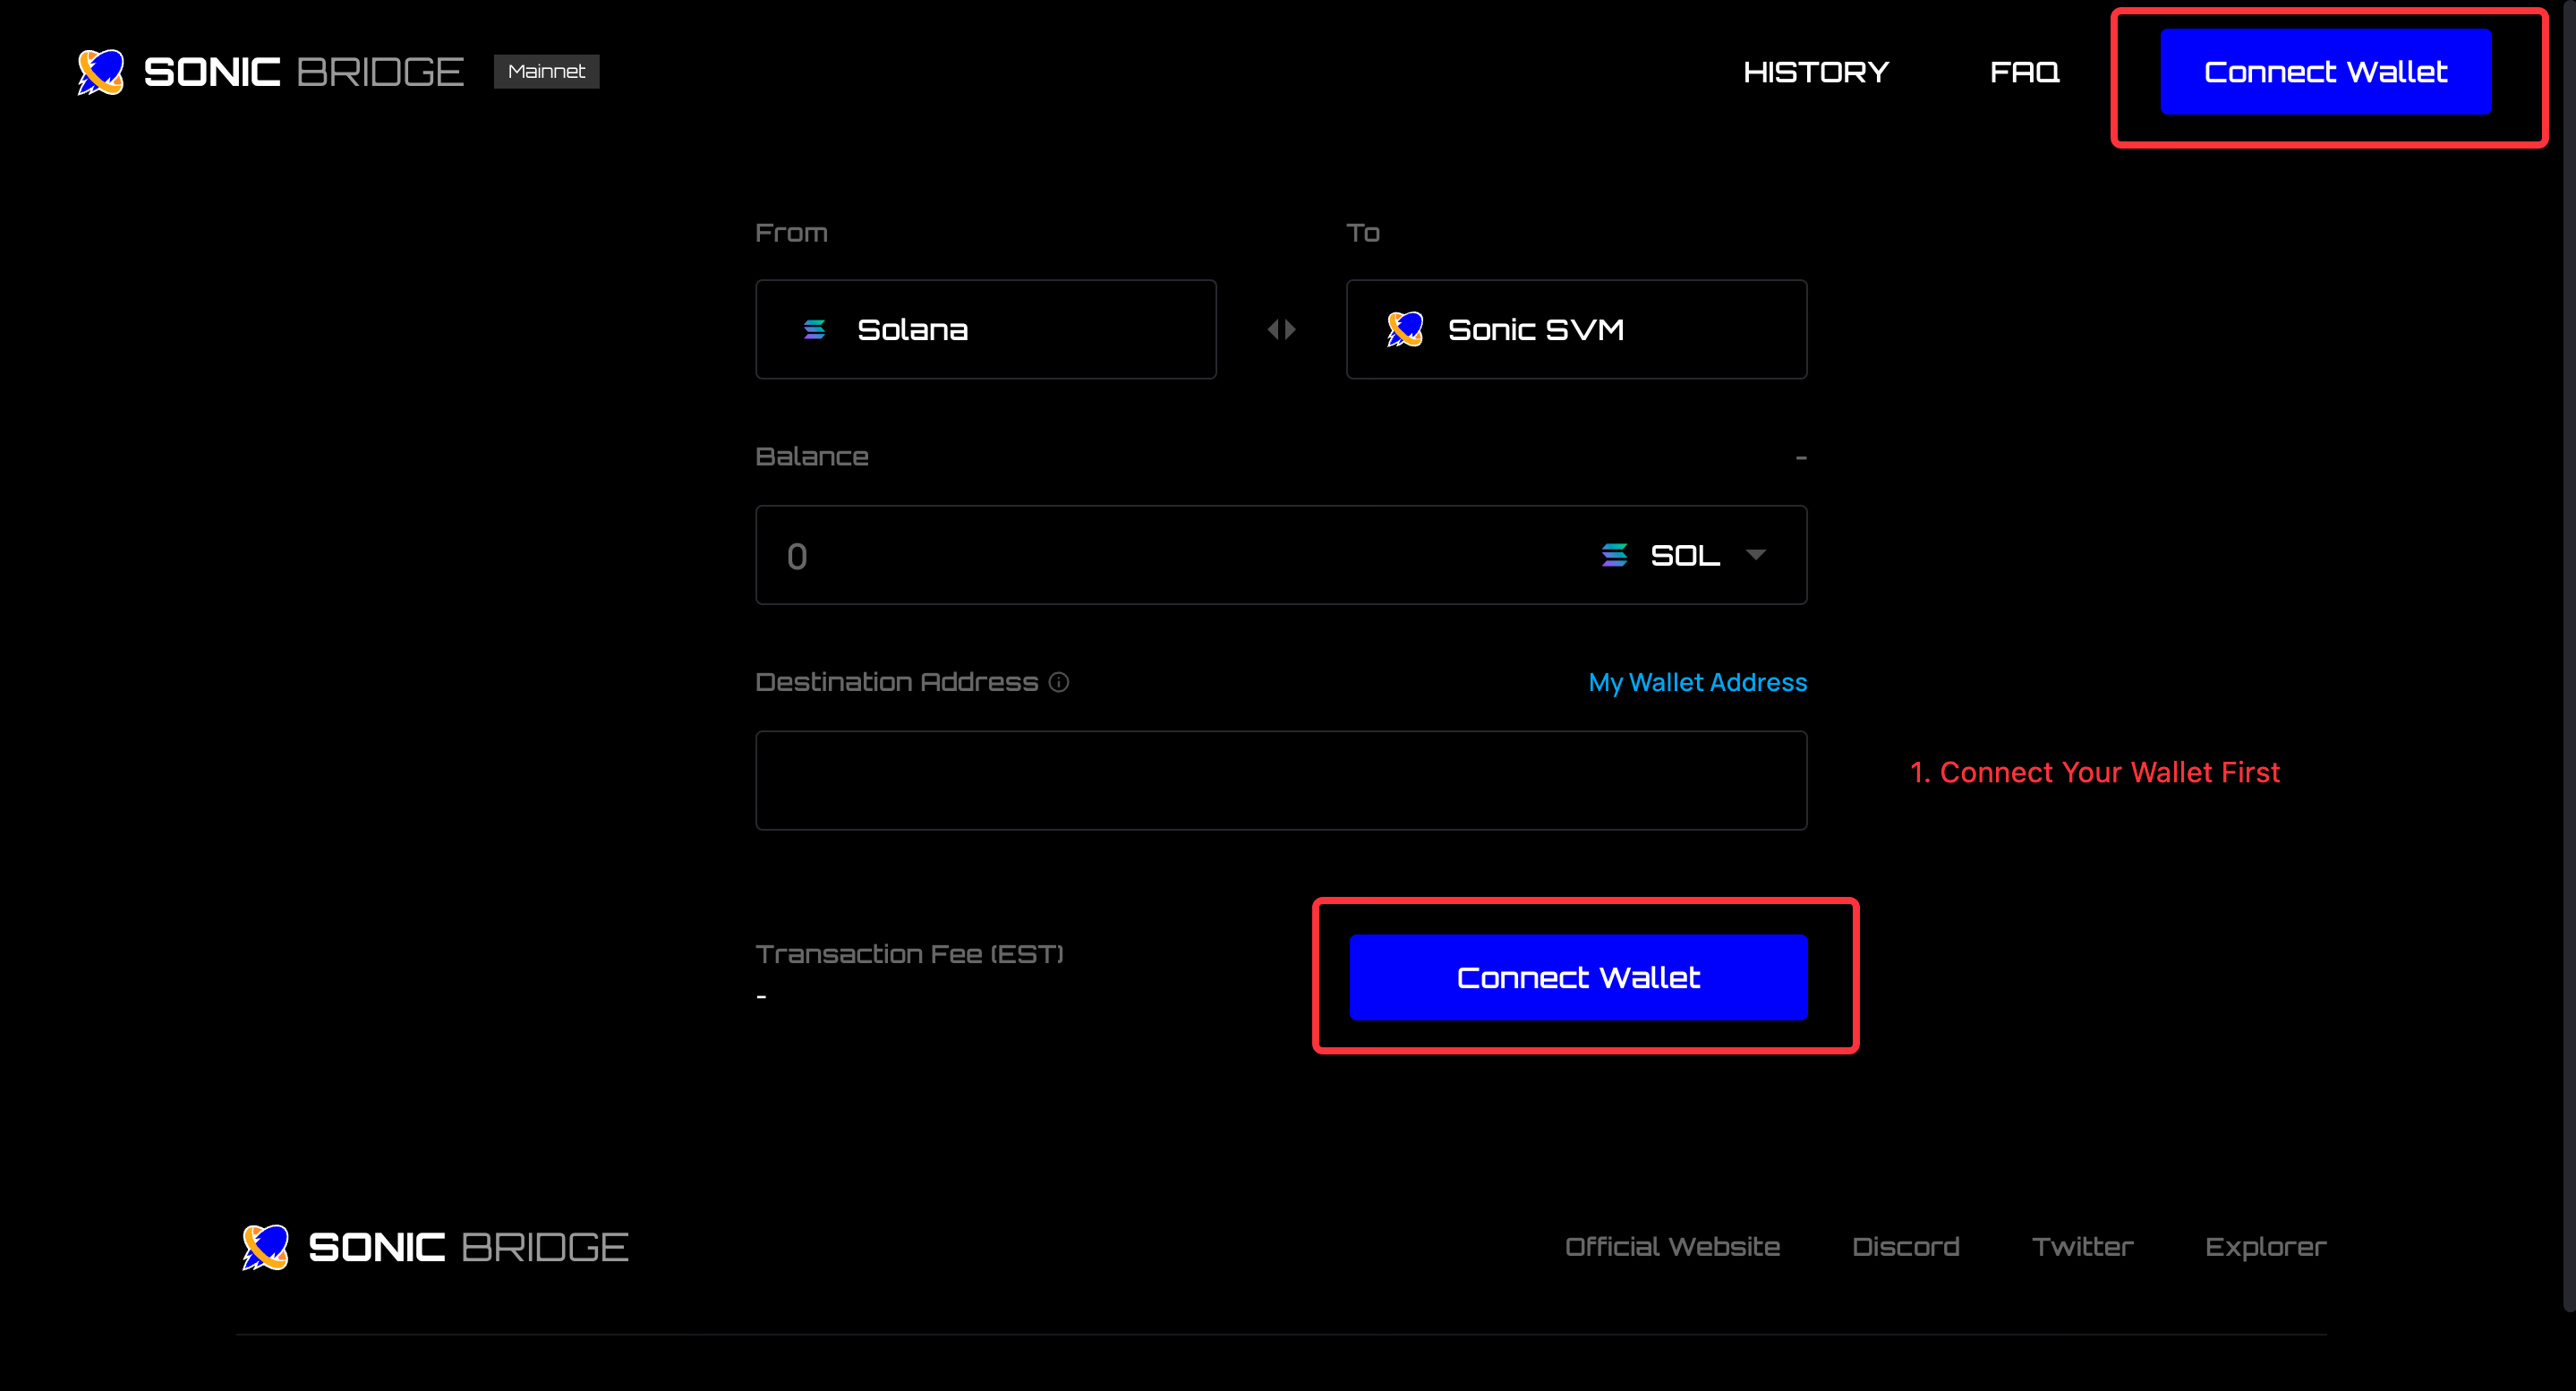
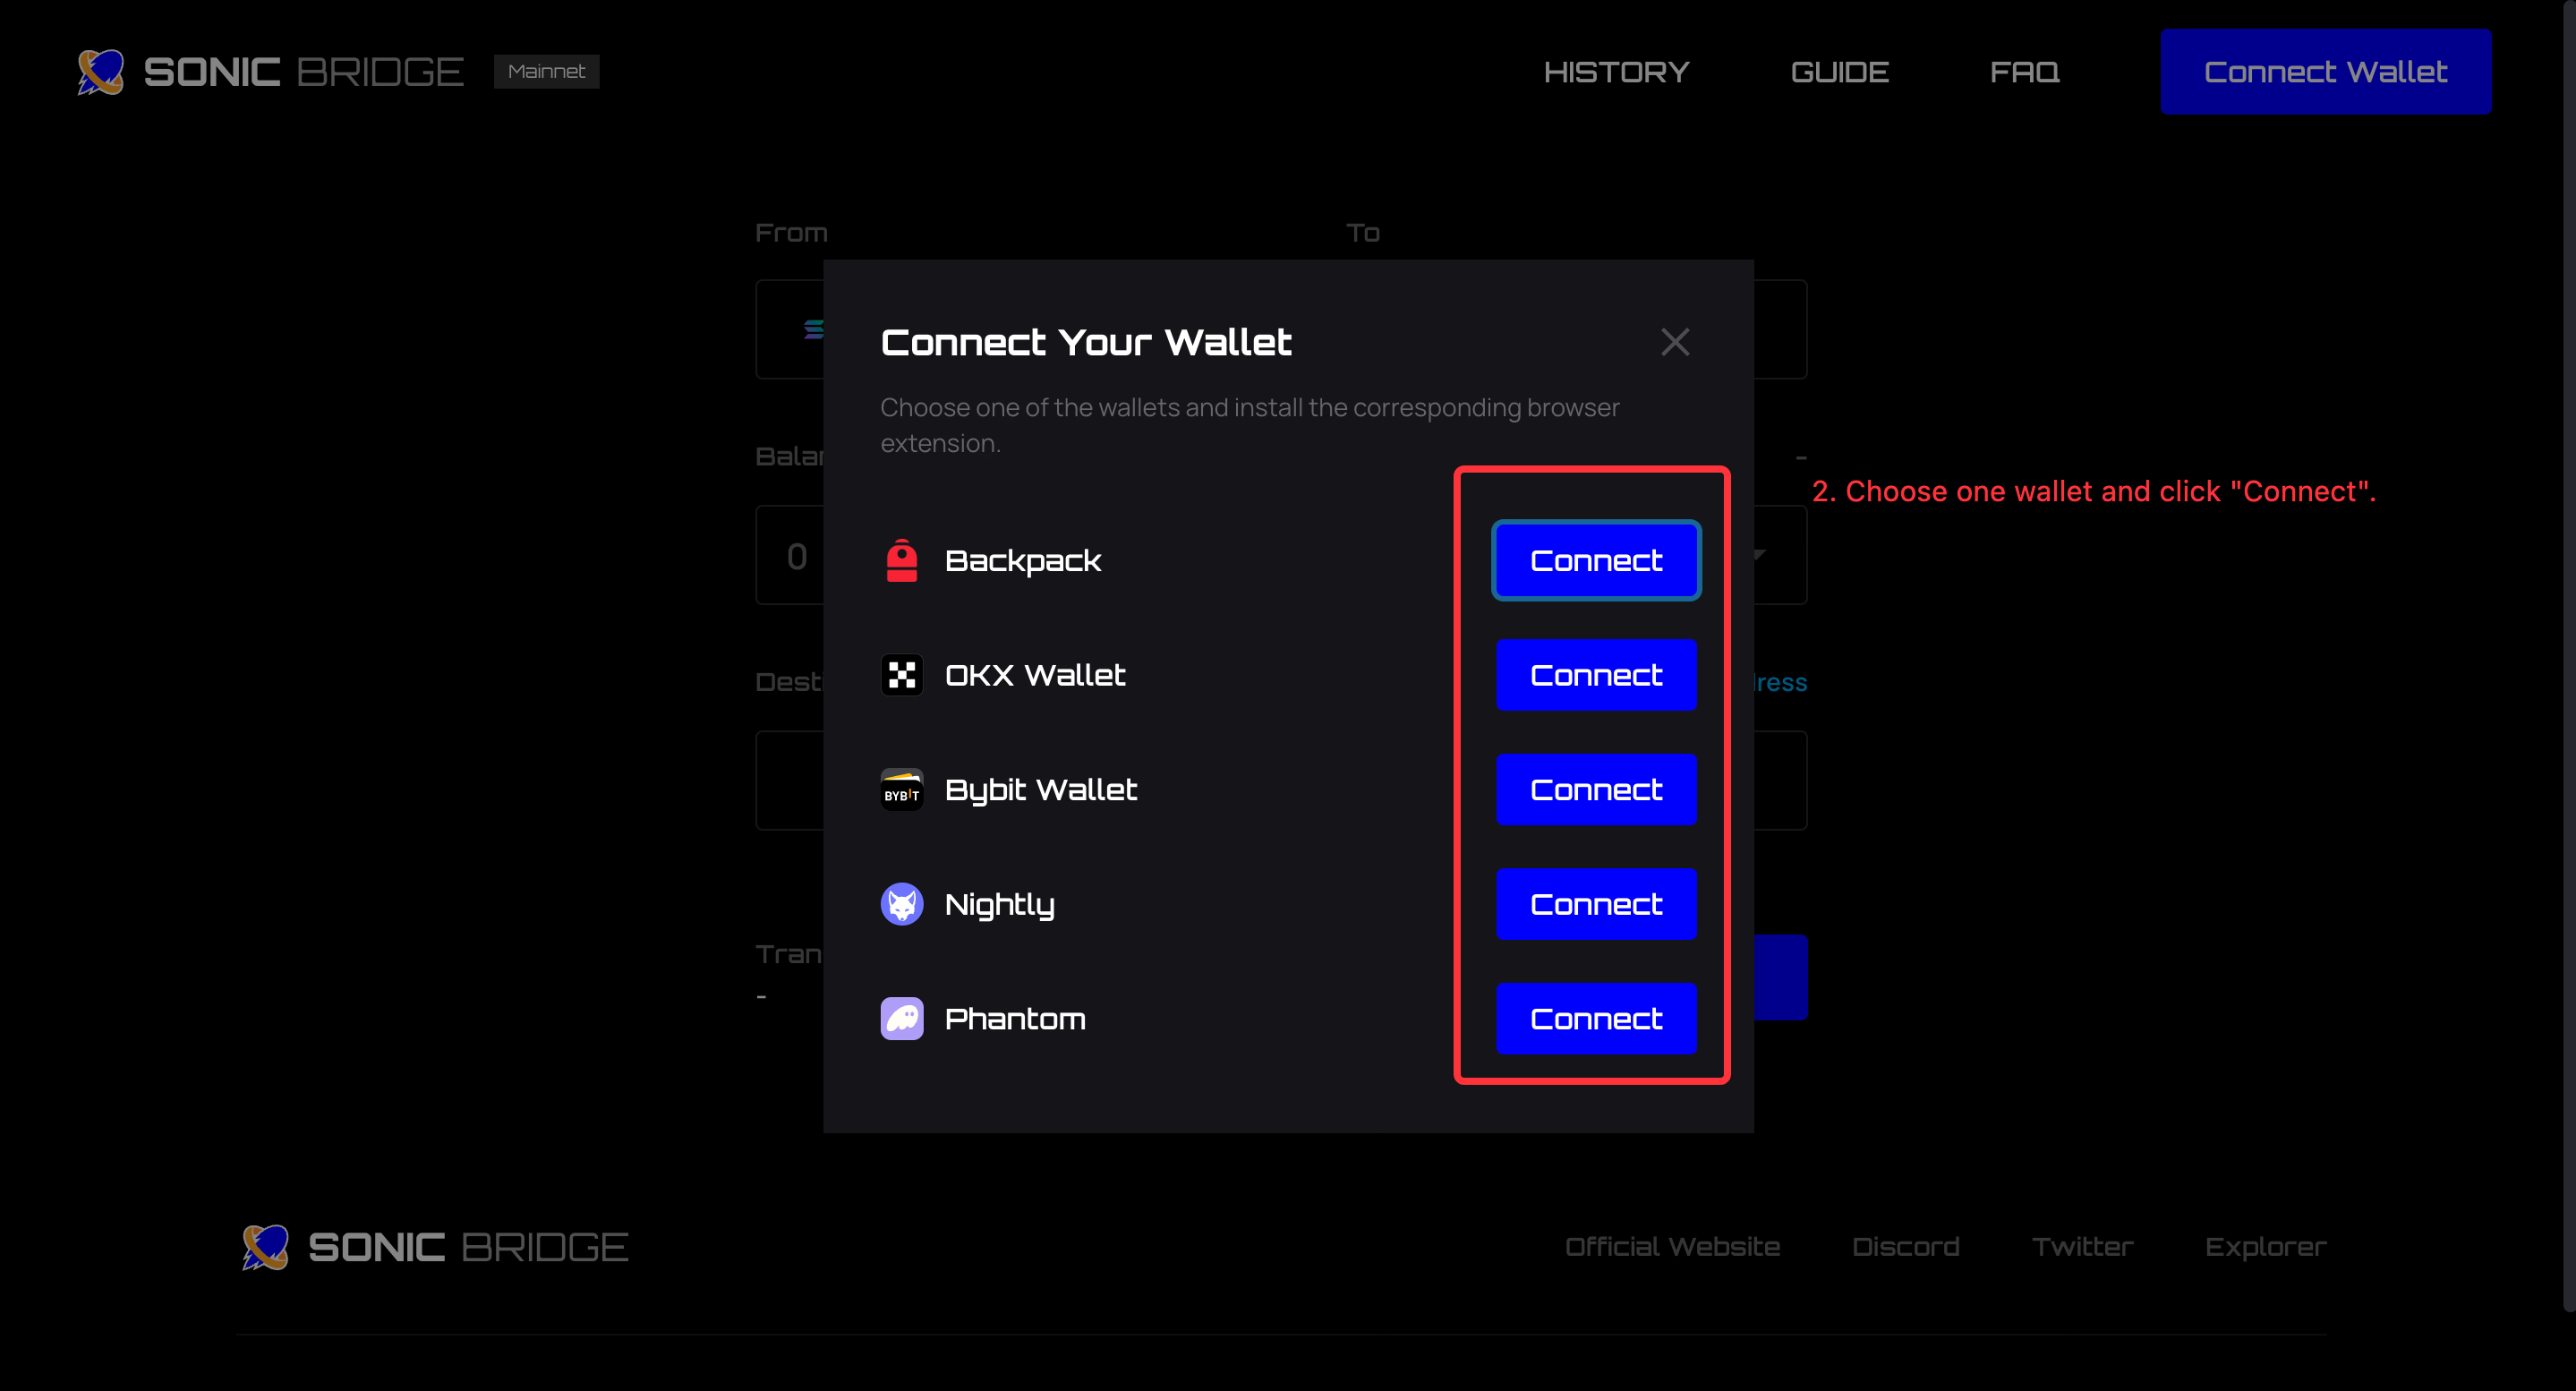
If you need instructions on how to connect your wallet to Sonic SVM, please click the corresponding link for a network setup guide.
- Guide for OKX wallet
- Guide for Backpack
- Guide for Nightly
- Guide for Bybit
Step 1: Select the Chain
Choose the source chain (where your tokens are currently) and the destination chain (where you want to transfer your tokens).
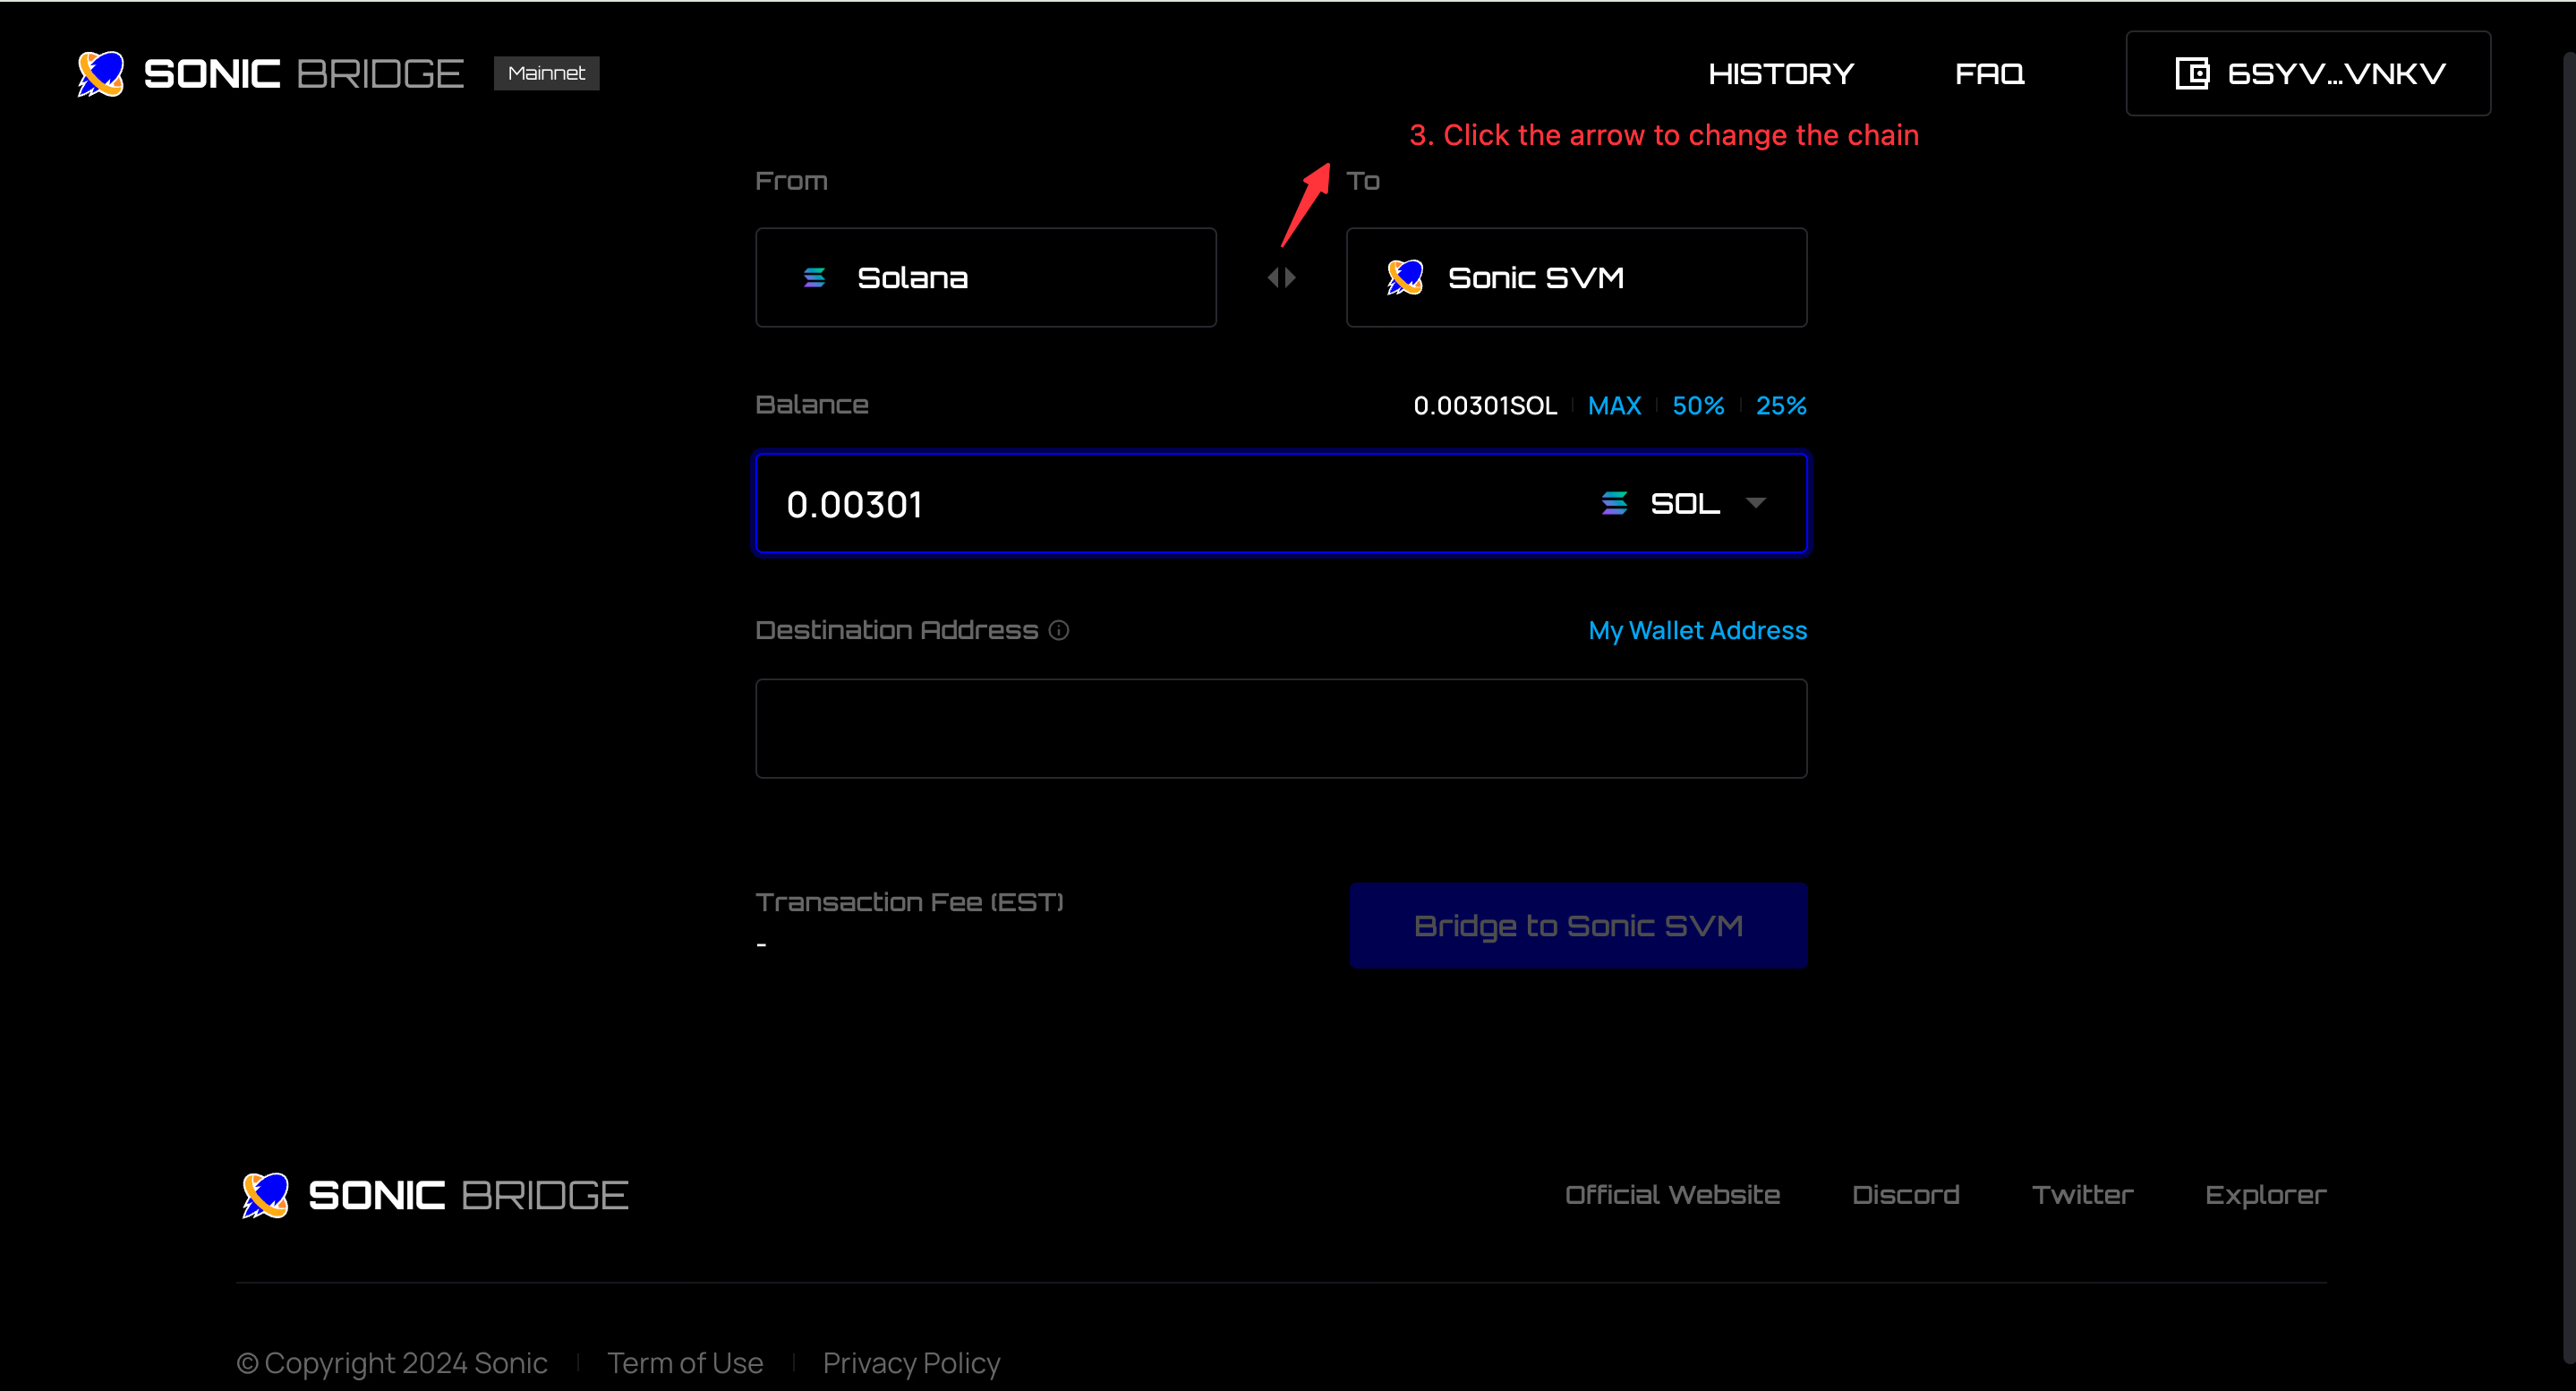
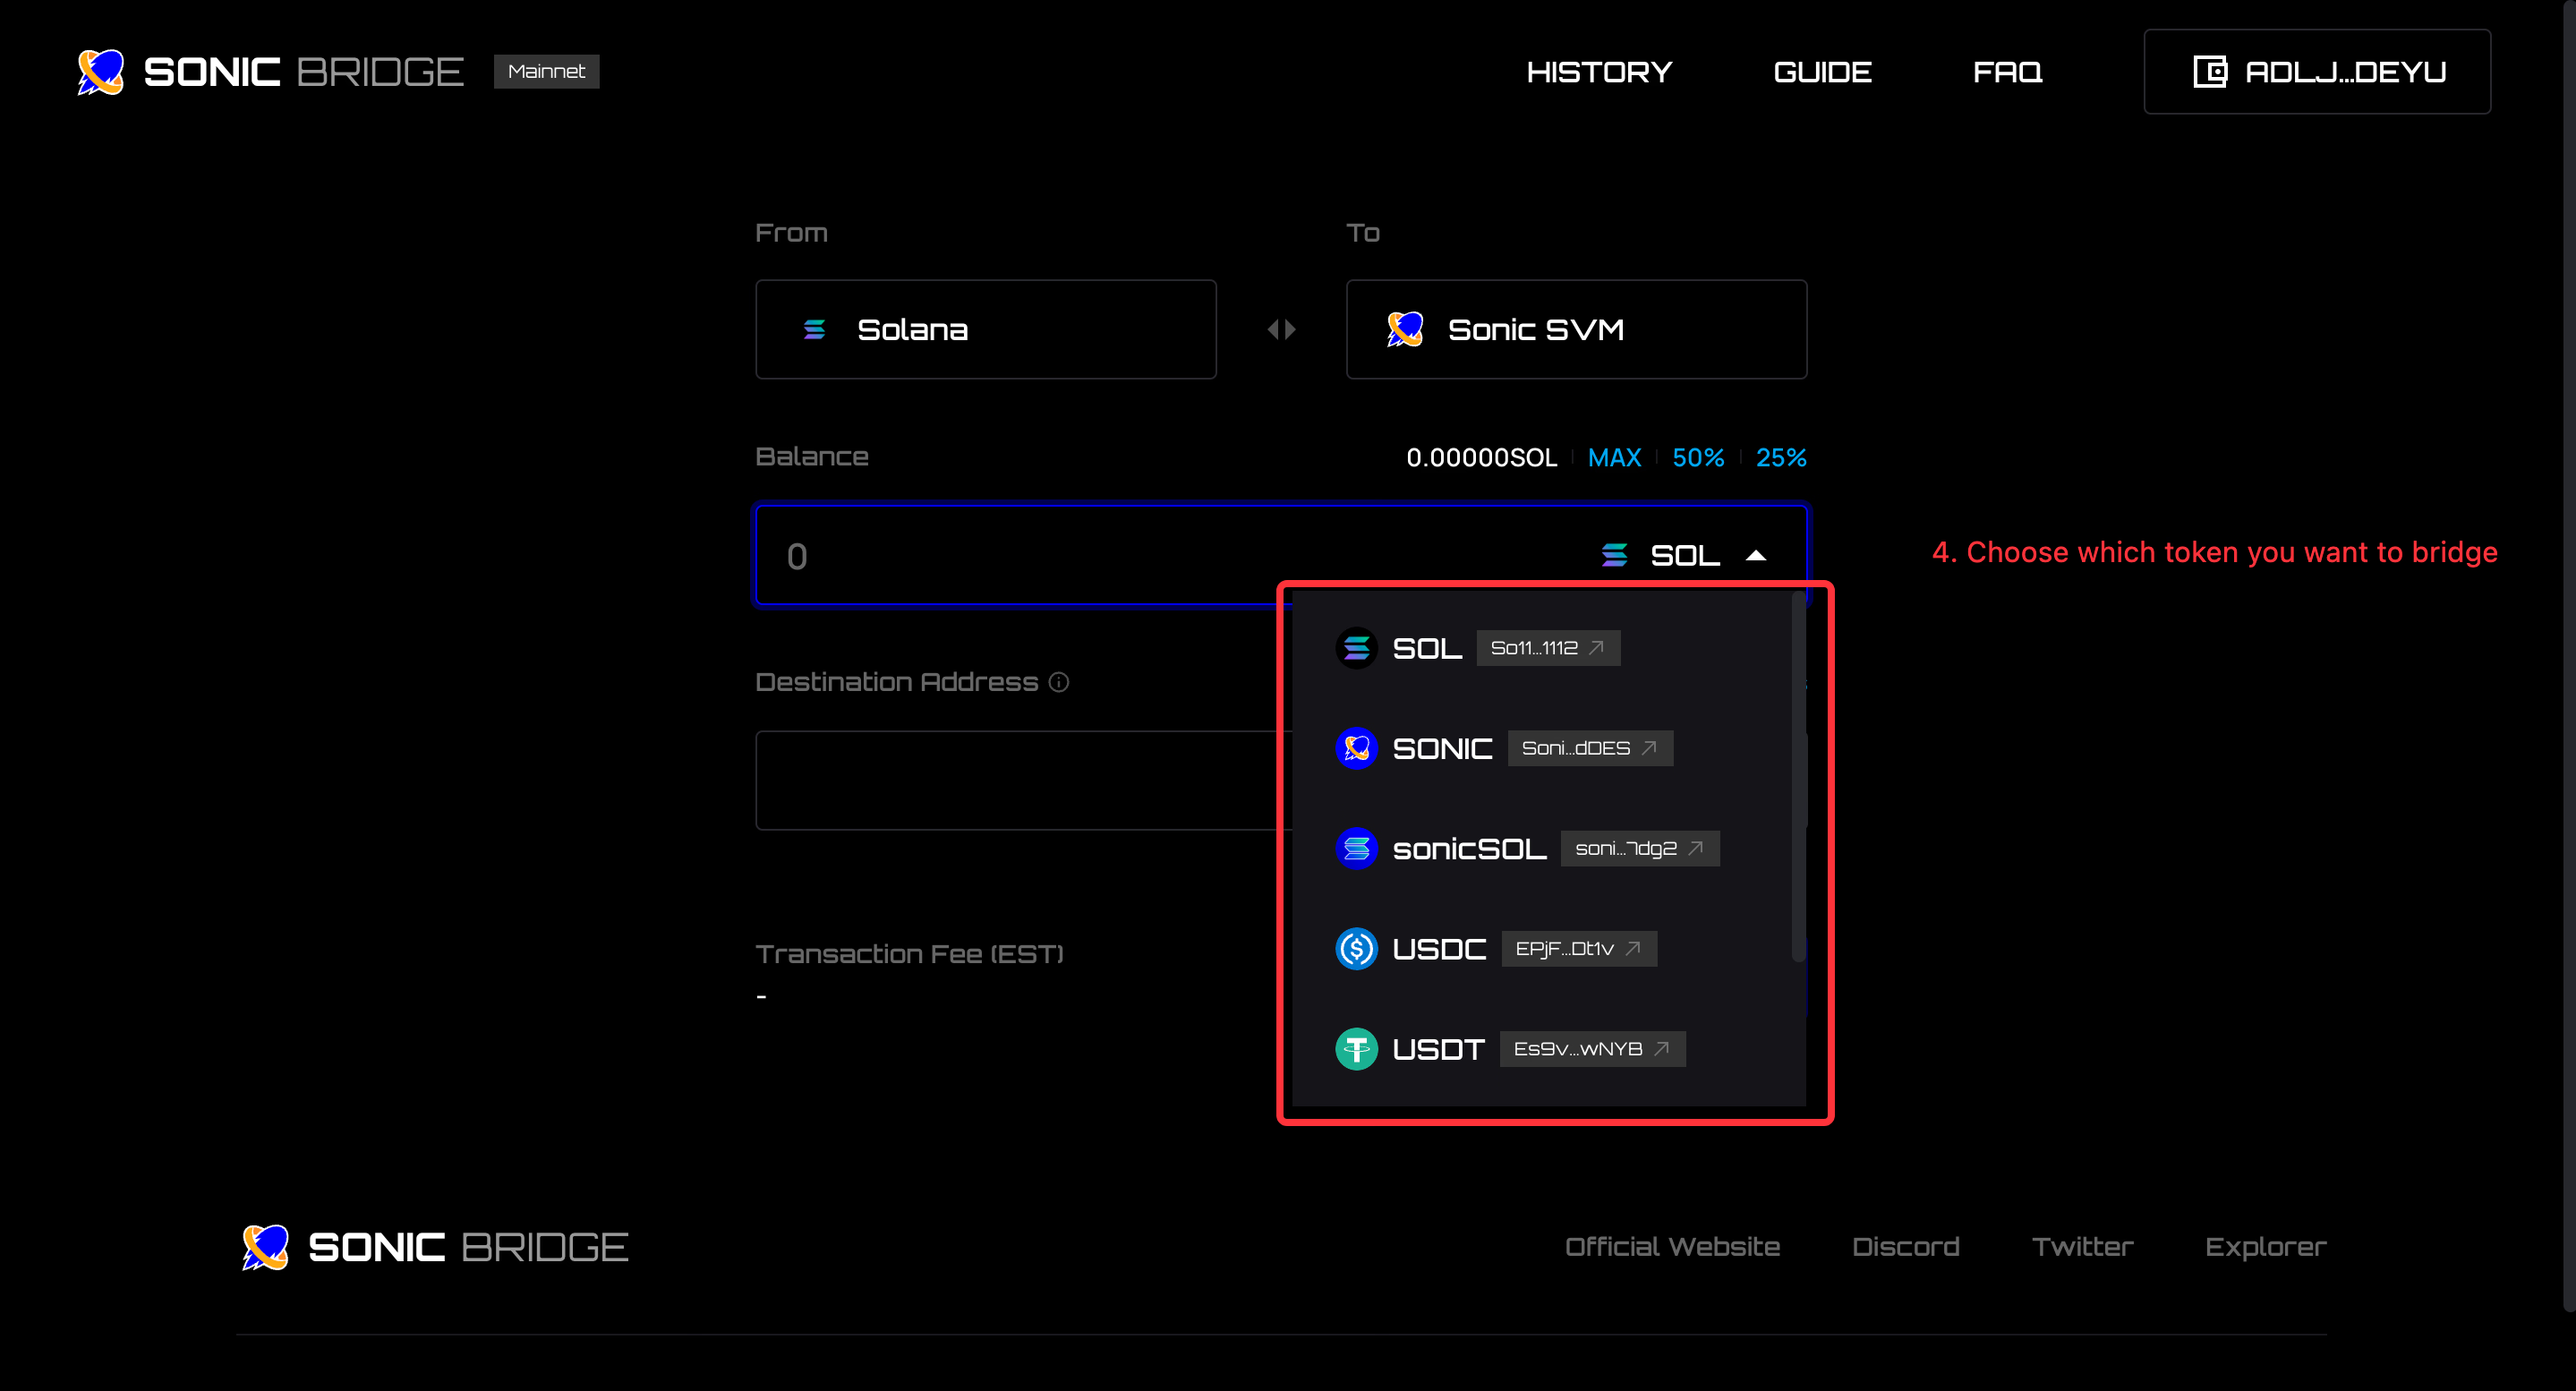
Step 2: Choose Token & Enter The Amount
- Select the token you want to bridge. Ensure that the token you choose has enough balance in your wallet.
- Specify the amount of the selected token that you wish to transfer.
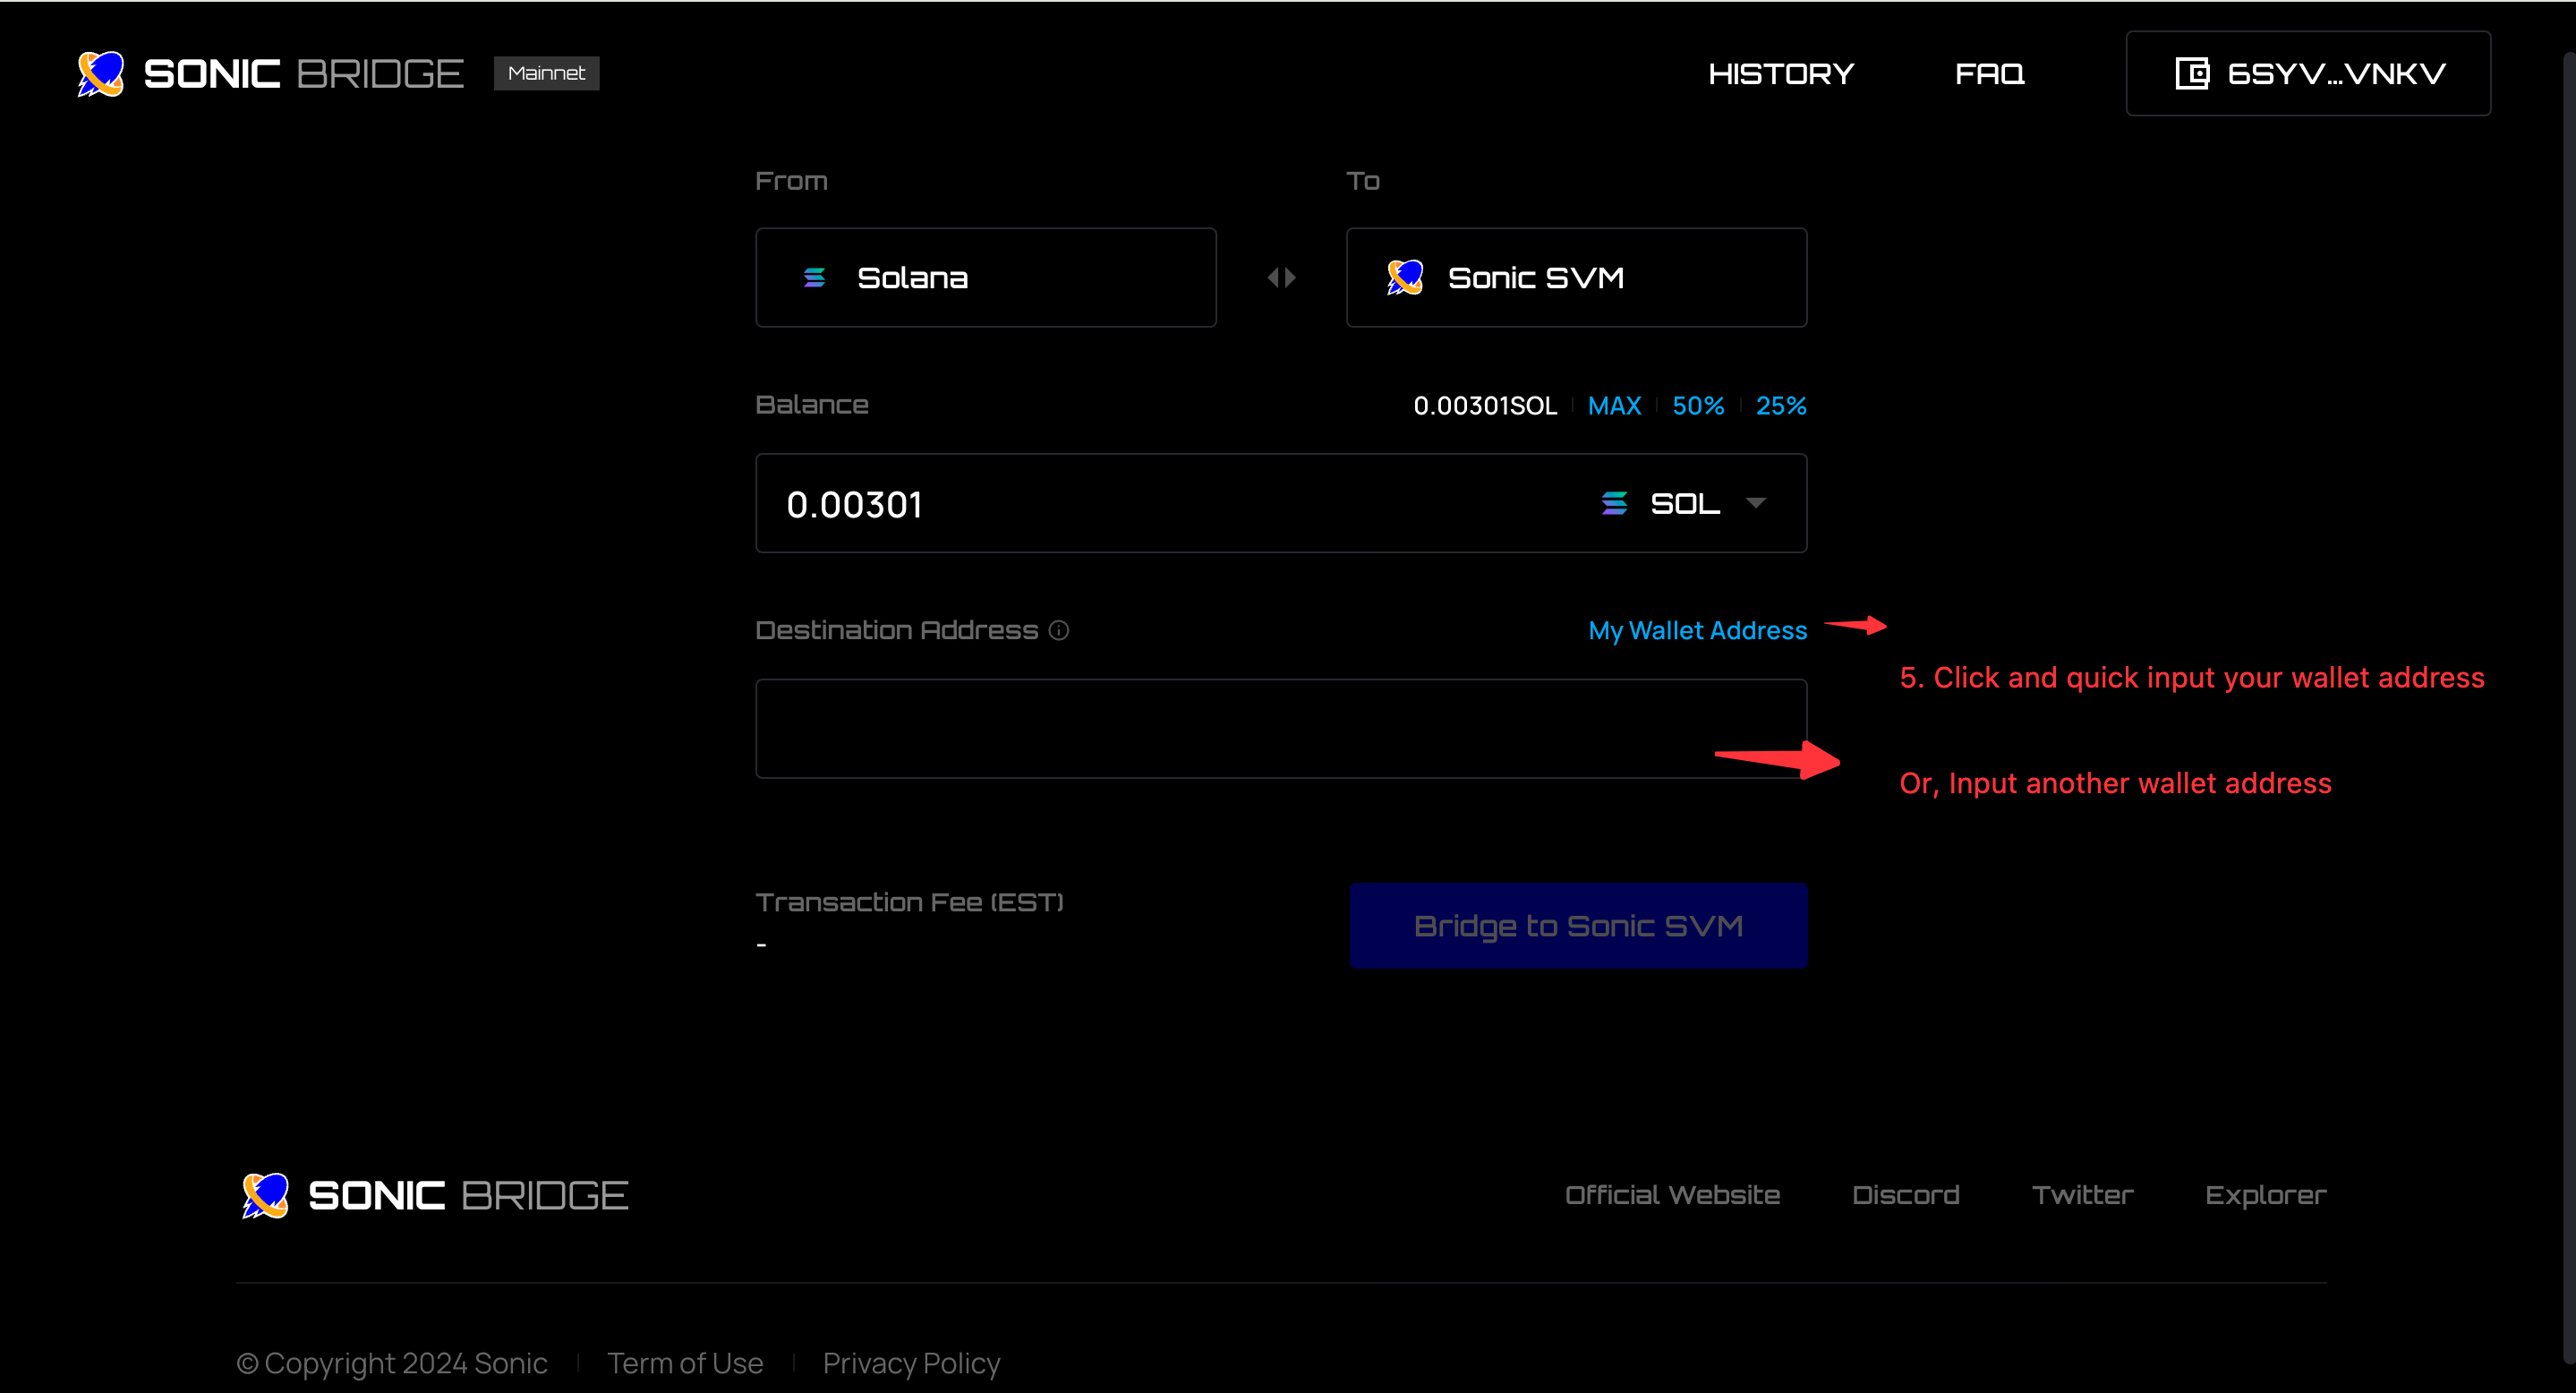
Step 3: Choose The Destination Wallet
Select the wallet to which you want to send the tokens. You can quickly choose your current connected wallet or manually enter the address of another wallet.
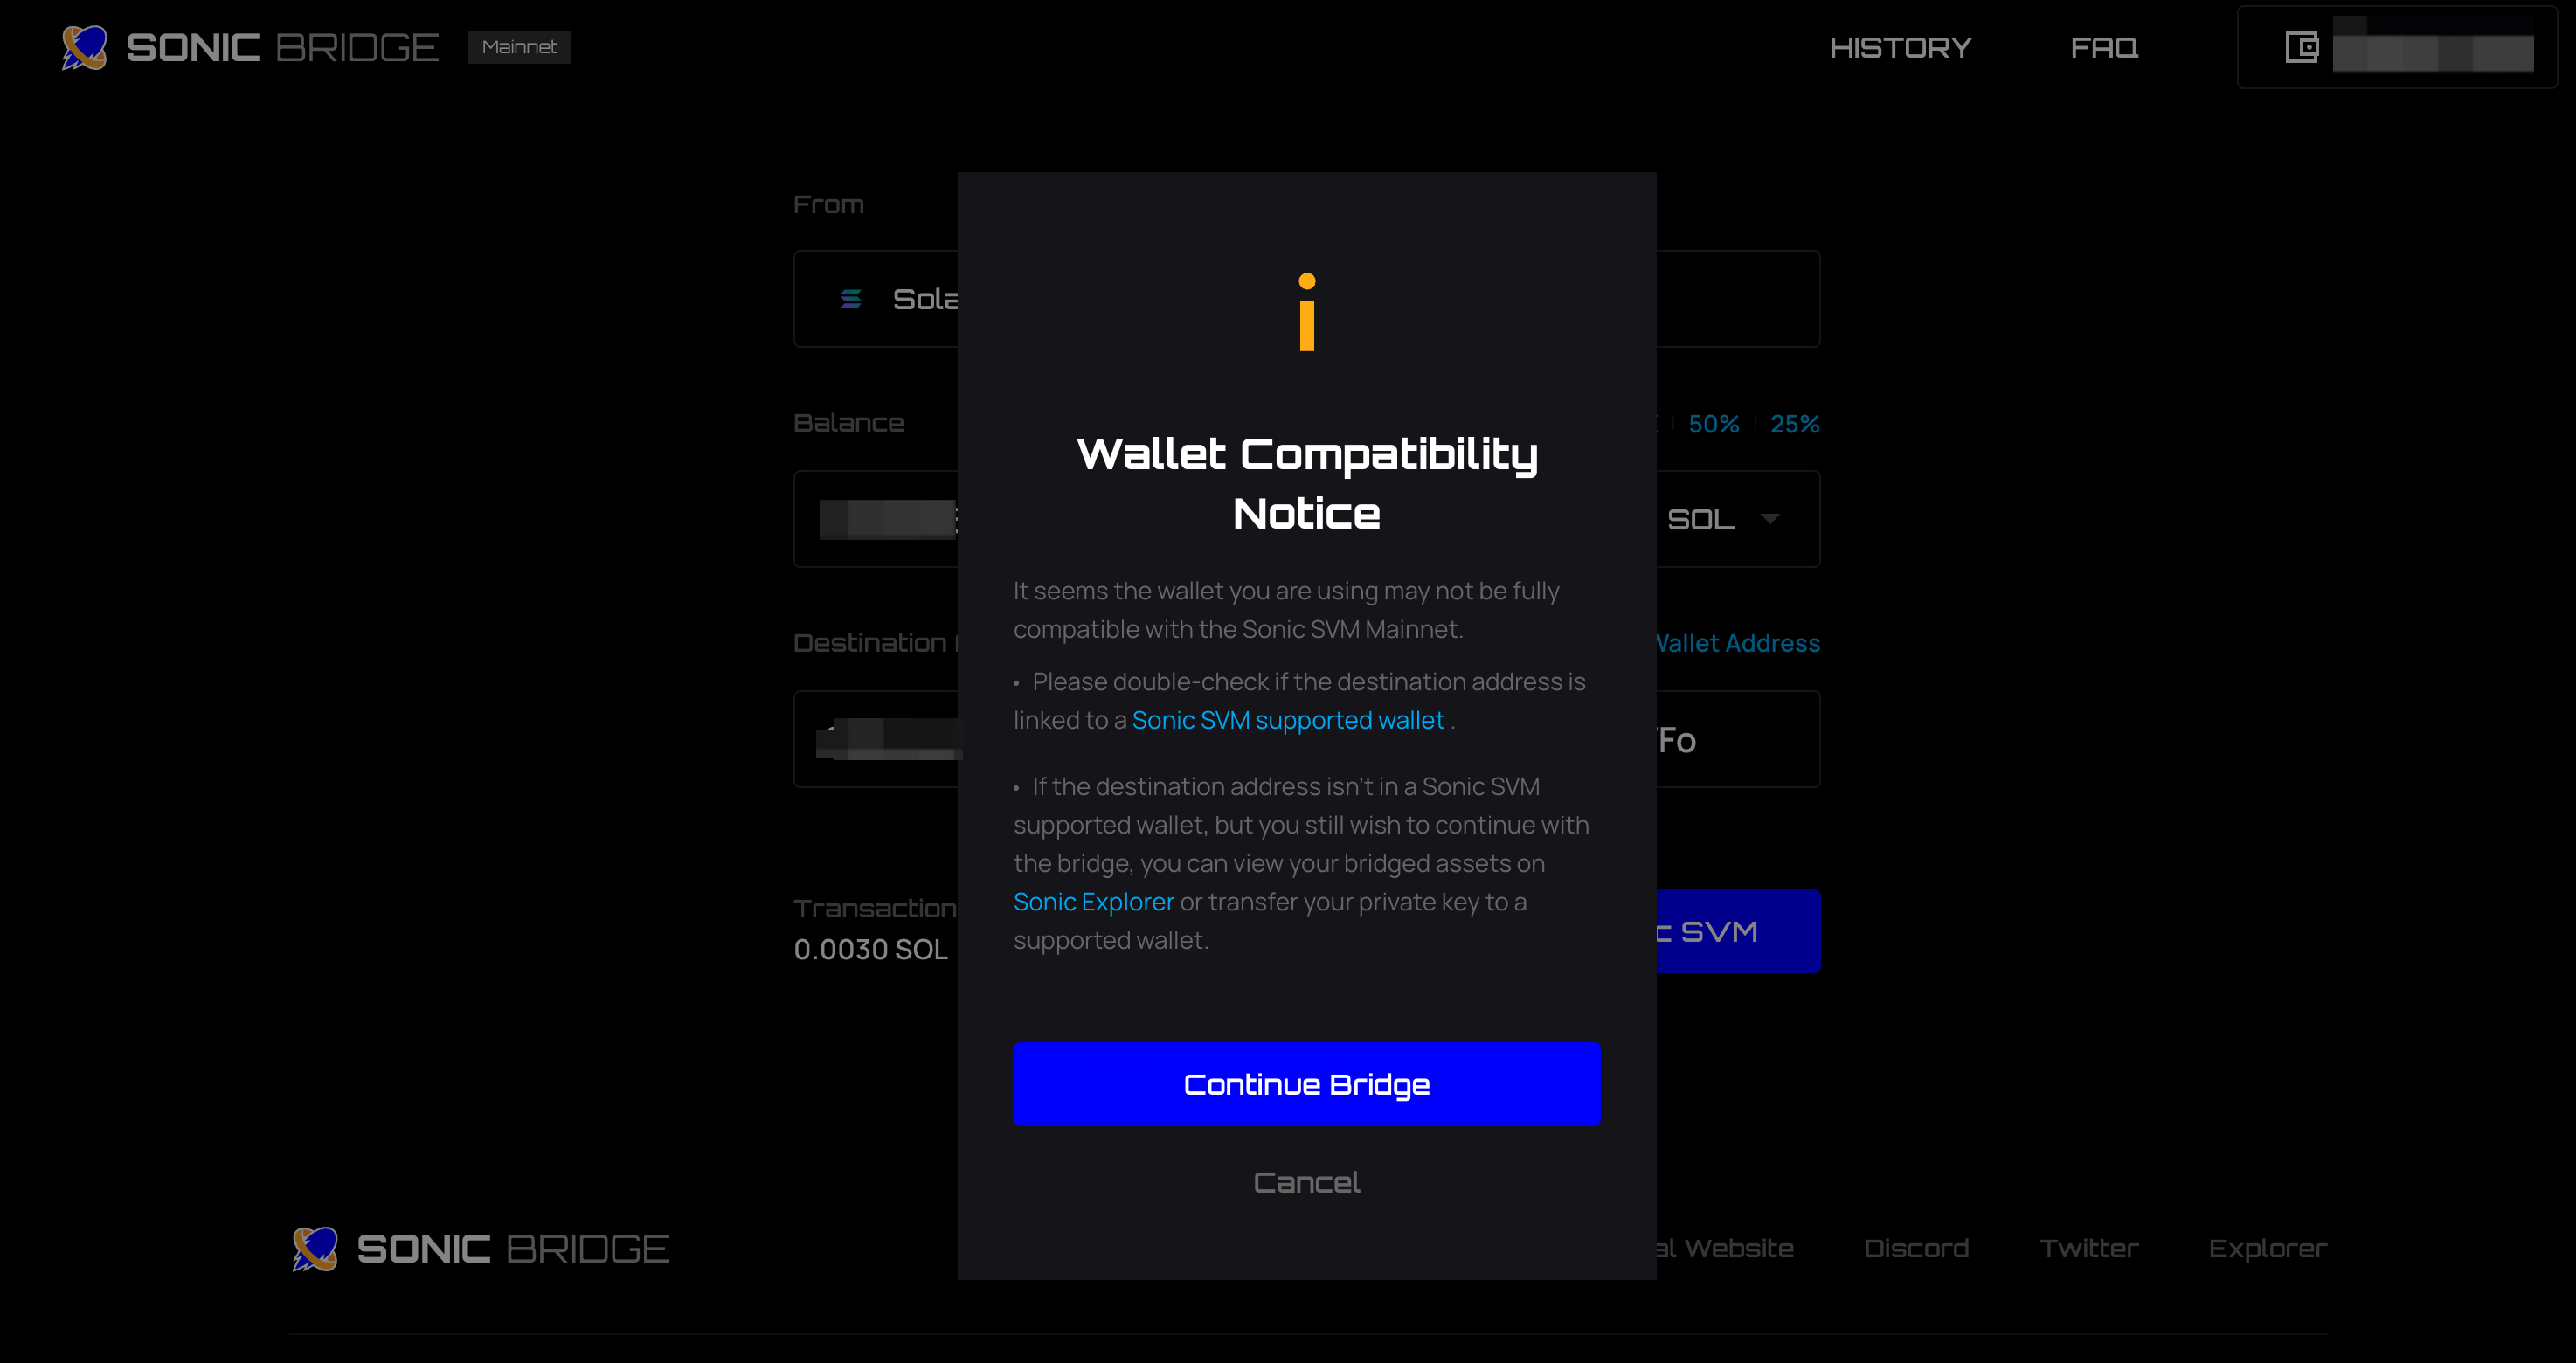
Note: The destination address is where your assets will be received on the target chain. Currently, Sonic SVM Mainnet supports Backpack, OKX Wallet, Bybit Wallet and Nightly Wallet. Please make sure the destination address is in one of these supported wallets.
If the wallet you connect is not supported by Sonic SVM Mainnet, a popup will appear to help you confirm the details:
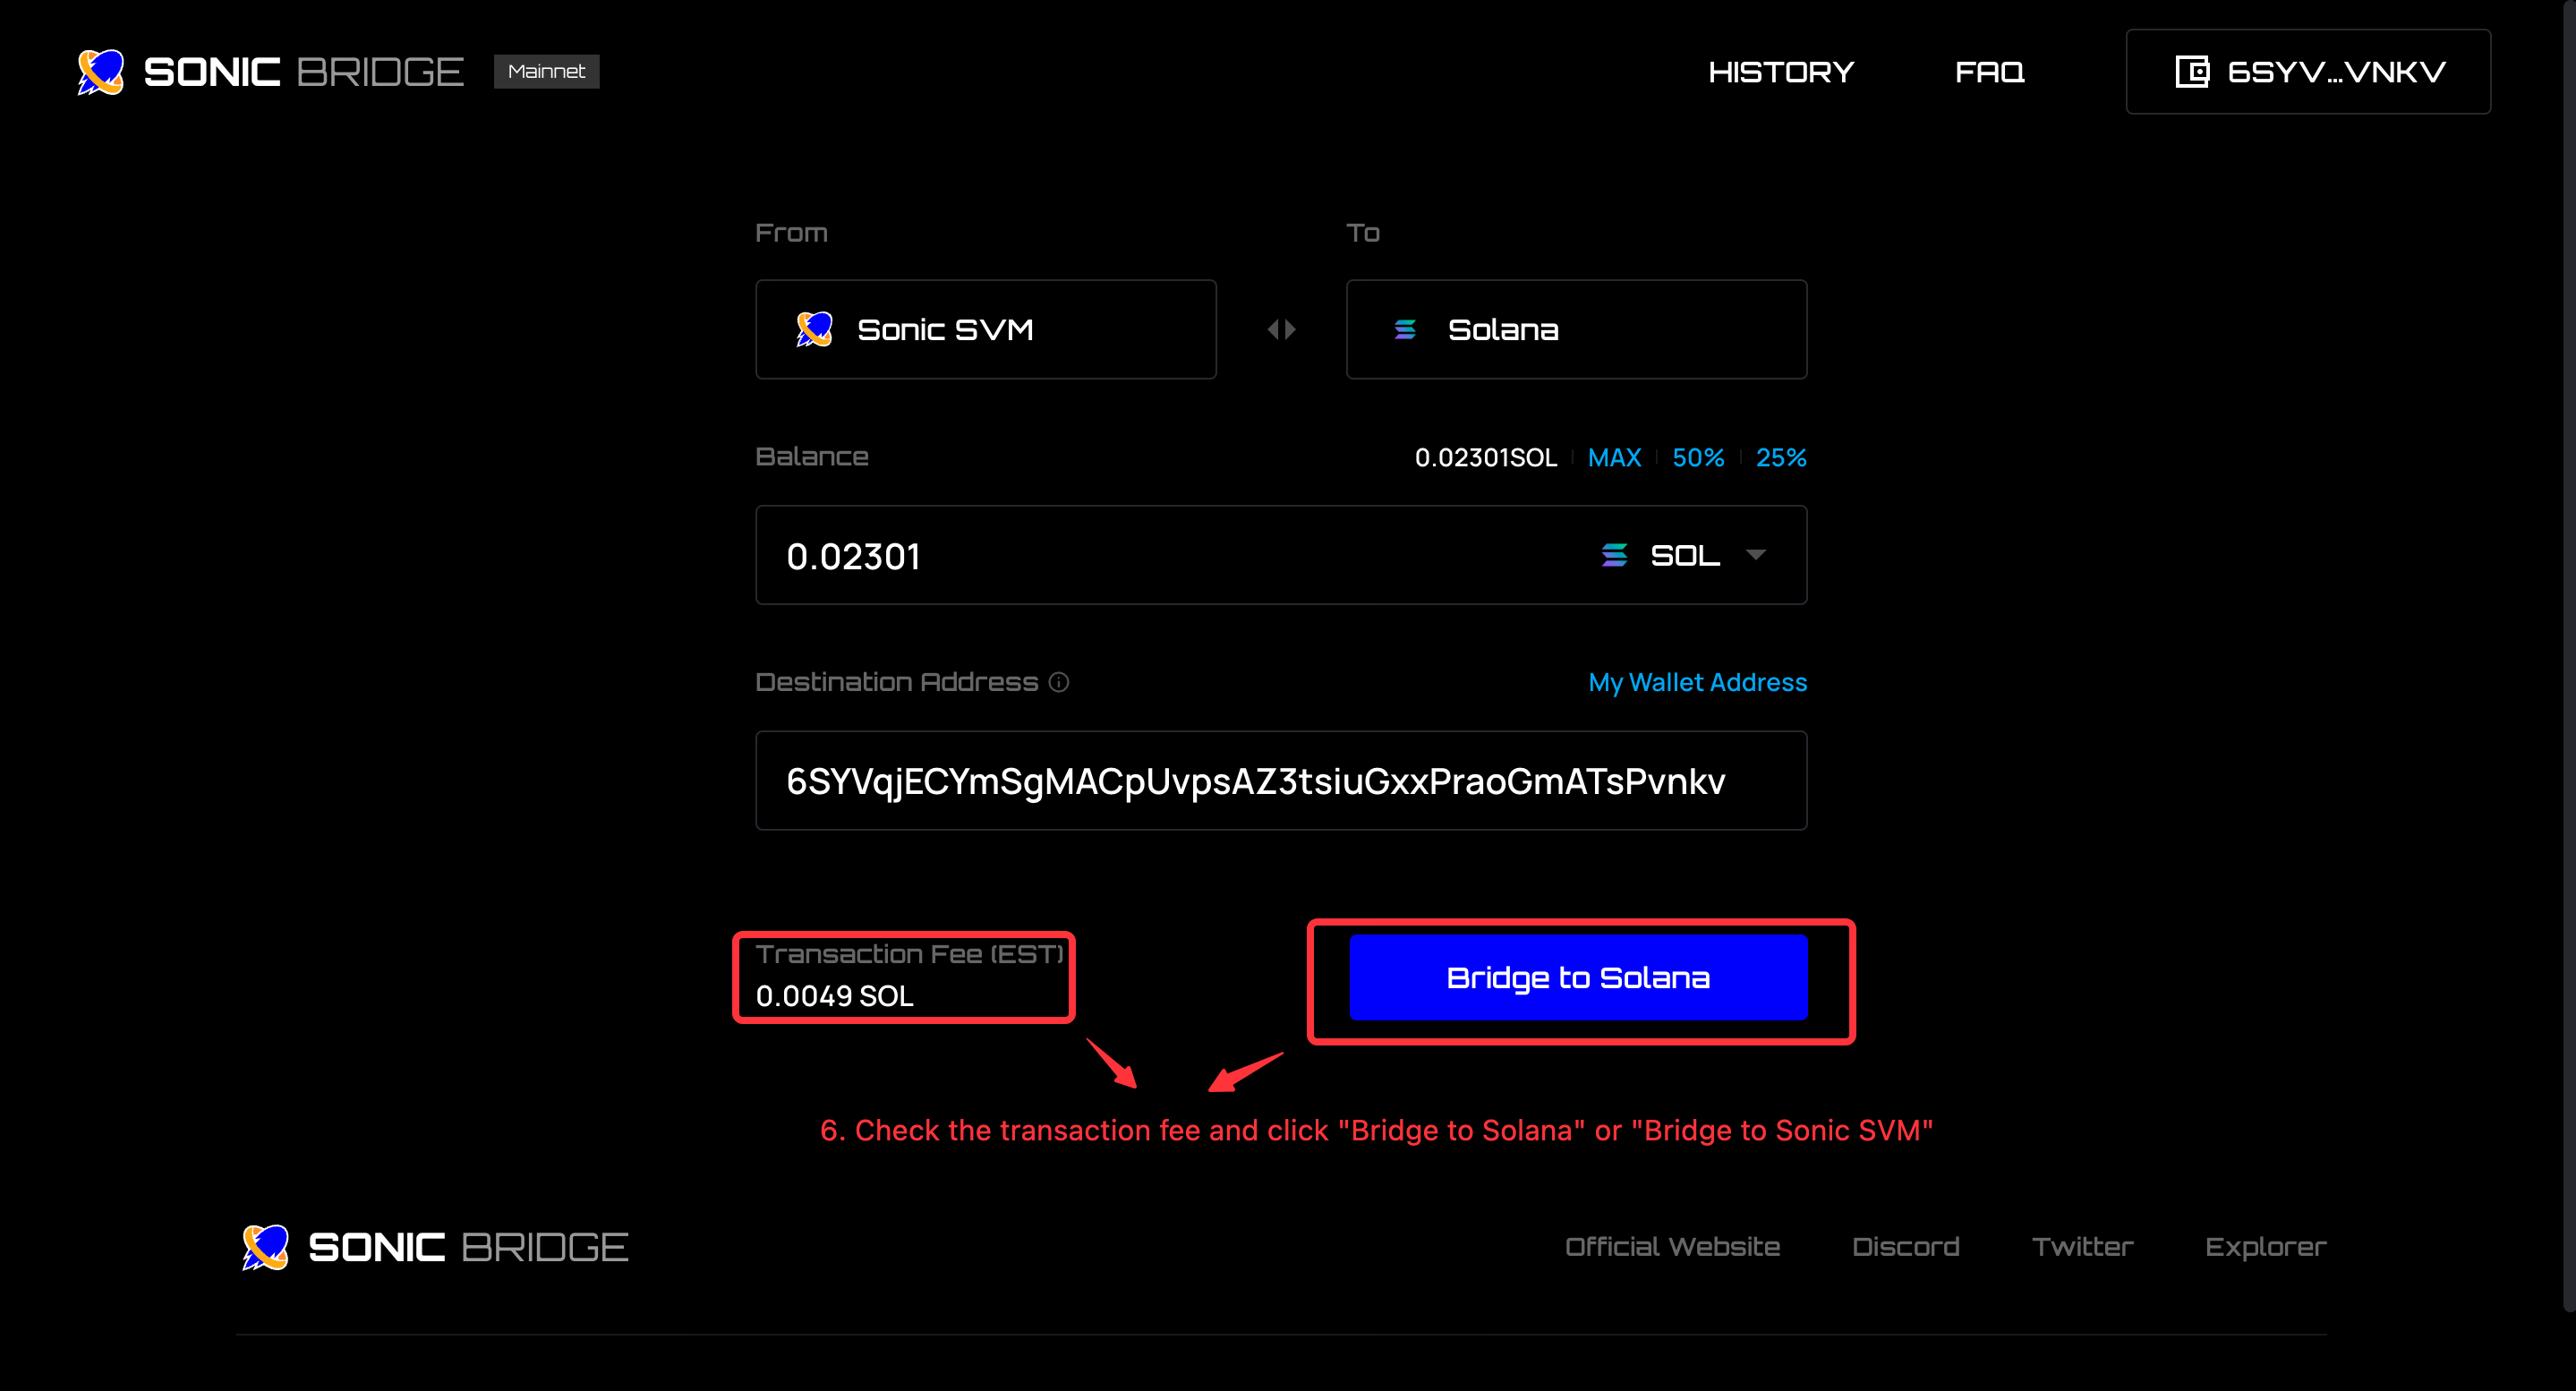
Step 4: Confirm "Bridge"
Review the gas fees for the transaction and click on the "Bridge" button to initiate the transfer. Make sure you're aware of the fees associated with the transaction.
Step 5: Sign the Transaction in Your Wallet
A pop-up will appear in your connected wallet asking for your signature. Review the details and sign the transaction to complete the bridge process.